Python 生成随机验证码

![Python 生成随机验证码[Python常见问题]](https://www.zixueka.com/wp-content/uploads/2023/10/1696934733-82be86d96369b28.jpg)
安装pillow模块
Python生成随机验证码,需要使用pillow模块.
安装命令:
pip3 install pillow
基本使用
创建图片
from PIL import Image
img = Image.new(mode="RGB", size=(120, 30), color=(255, 255, 255))

# 在图片查看器中打开
# img.show()

# 保存在本地
with open("code.png","wb") as f:
    img.save(f,format="png")
创建画笔,用于在图片上画任意内容
img = Image.new(mode="RGB", size=(120, 30), color=(255, 255, 255))
draw = ImageDraw.Draw(img, mode="RGB")
画点
img = Image.new(mode="RGB", size=(120, 30), color=(255, 255, 255))
draw = ImageDraw.Draw(img, mode="RGB")
# 第一个参数:表示坐标
# 第二个参数:表示颜色
draw.point([100, 100], fill="red")
draw.point([300, 300], fill=(255, 255, 255))
画线
img = Image.new(mode="RGB", size=(120, 30), color=(255, 255, 255))
draw = ImageDraw.Draw(img, mode="RGB")
# 第一个参数:表示起始坐标和结束坐标
# 第二个参数:表示颜色
draw.line((100,100,100,300), fill="red")
draw.line((100,100,300,100), fill=(255, 255, 255))
画圆
img = Image.new(mode="RGB", size=(120, 30), color=(255, 255, 255))
draw = ImageDraw.Draw(img, mode="RGB")
# 第一个参数:表示起始坐标和结束坐标(圆要画在其中间)
# 第二个参数:表示开始角度
# 第三个参数:表示结束角度
# 第四个参数:表示颜色
draw.arc((100,100,300,300),0,90,fill="red")
写文本
img = Image.new(mode="RGB", size=(120, 30), color=(255, 255, 255))
draw = ImageDraw.Draw(img, mode="RGB")
# 第一个参数:表示起始坐标
# 第二个参数:表示写入内容
# 第三个参数:表示颜色
draw.text([0,0],"python","red")
特殊字体文字
img = Image.new(mode="RGB", size=(120, 30), color=(255, 255, 255))
draw = ImageDraw.Draw(img, mode="RGB")
# 第一个参数:表示字体文件路径
# 第二个参数:表示字体大小
font = ImageFont.truetype("kumo.ttf", 28)
# 第一个参数:表示起始坐标
# 第二个参数:表示写入内容
# 第三个参数:表示颜色
# 第四个参数:表示颜色
draw.text([0, 0], "python", "red", font=font)
生成图片验证码
import random

def check_code(width=120, height=30, char_length=5, font_file="kumo.ttf", font_size=28):
    code = []
    img = Image.new(mode="RGB", size=(width, height), color=(255, 255, 255))
    draw = ImageDraw.Draw(img, mode="RGB")

    def rndChar():
        """
        生成随机字母
        :return:
        """
        return chr(random.randint(65, 90))

    def rndColor():
        """
        生成随机颜色
        :return:
        """
        return (random.randint(0, 255), random.randint(10, 255), random.randint(64, 255))

    # 写文字
    font = ImageFont.truetype(font_file, font_size)
    for i in range(char_length):
        char = rndChar()
        code.append(char)
        h = random.randint(0, 4)
        draw.text([i * width / char_length, h], char, font=font, fill=rndColor())

    # 写干扰点
    for i in range(40):
        draw.point([random.randint(0, width), random.randint(0, height)], fill=rndColor())

    # 写干扰圆圈
    for i in range(40):
        draw.point([random.randint(0, width), random.randint(0, height)], fill=rndColor())
        x = random.randint(0, width)
        y = random.randint(0, height)
        draw.arc((x, y, x + 4, y + 4), 0, 90, fill=rndColor())

    # 画干扰线
    for i in range(5):
        x1 = random.randint(0, width)
        y1 = random.randint(0, height)
        x2 = random.randint(0, width)
        y2 = random.randint(0, height)

        draw.line((x1, y1, x2, y2), fill=rndColor())

    img = img.filter(ImageFilter.EDGE_ENHANCE_MORE)
    return img,"".join(code)


if __name__ == "__main__":
    # 1. 直接打开
    # img,code = check_code()
    # img.show()

    # 2. 写入文件
    # img,code = check_code()
    # with open("code.png","wb") as f:
    #     img.save(f,format="png")

    # 3. 写入内存(Python3)
    # from io import BytesIO
    # stream = BytesIO()
    # img.save(stream, "png")
    # stream.getvalue()

    # 4. 写入内存(Python2)
    # import StringIO
    # stream = StringIO.StringIO()
    # img.save(stream, "png")
    # stream.getvalue()

    pass
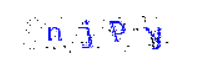
效果图
附件
字体文件下载:
https://files-cdn.cnblogs.com/files/wupeiqi/验证码字体文件.zip
